Quick Start
Ce contenu n’est pas encore disponible dans votre langue.
This guide walks you through the minimum steps needed to start accepting transfer bookings. By the end, you’ll have a working booking form that customers can use.
What You’ll Set Up
Section titled “What You’ll Set Up”To accept your first booking, you need three things configured:
- At least one vehicle - Defines what customers can book
- An availability zone - Defines where you operate
- Basic pricing - Defines how much to charge
Let’s get started.
Step 1: Add Your First Vehicle
Section titled “Step 1: Add Your First Vehicle”Vehicles represent what kind of vehicle a customer can book. Each vehicle has a passenger and luggage capacity that determines which bookings it can accommodate, and is directly linked to pricing.
-
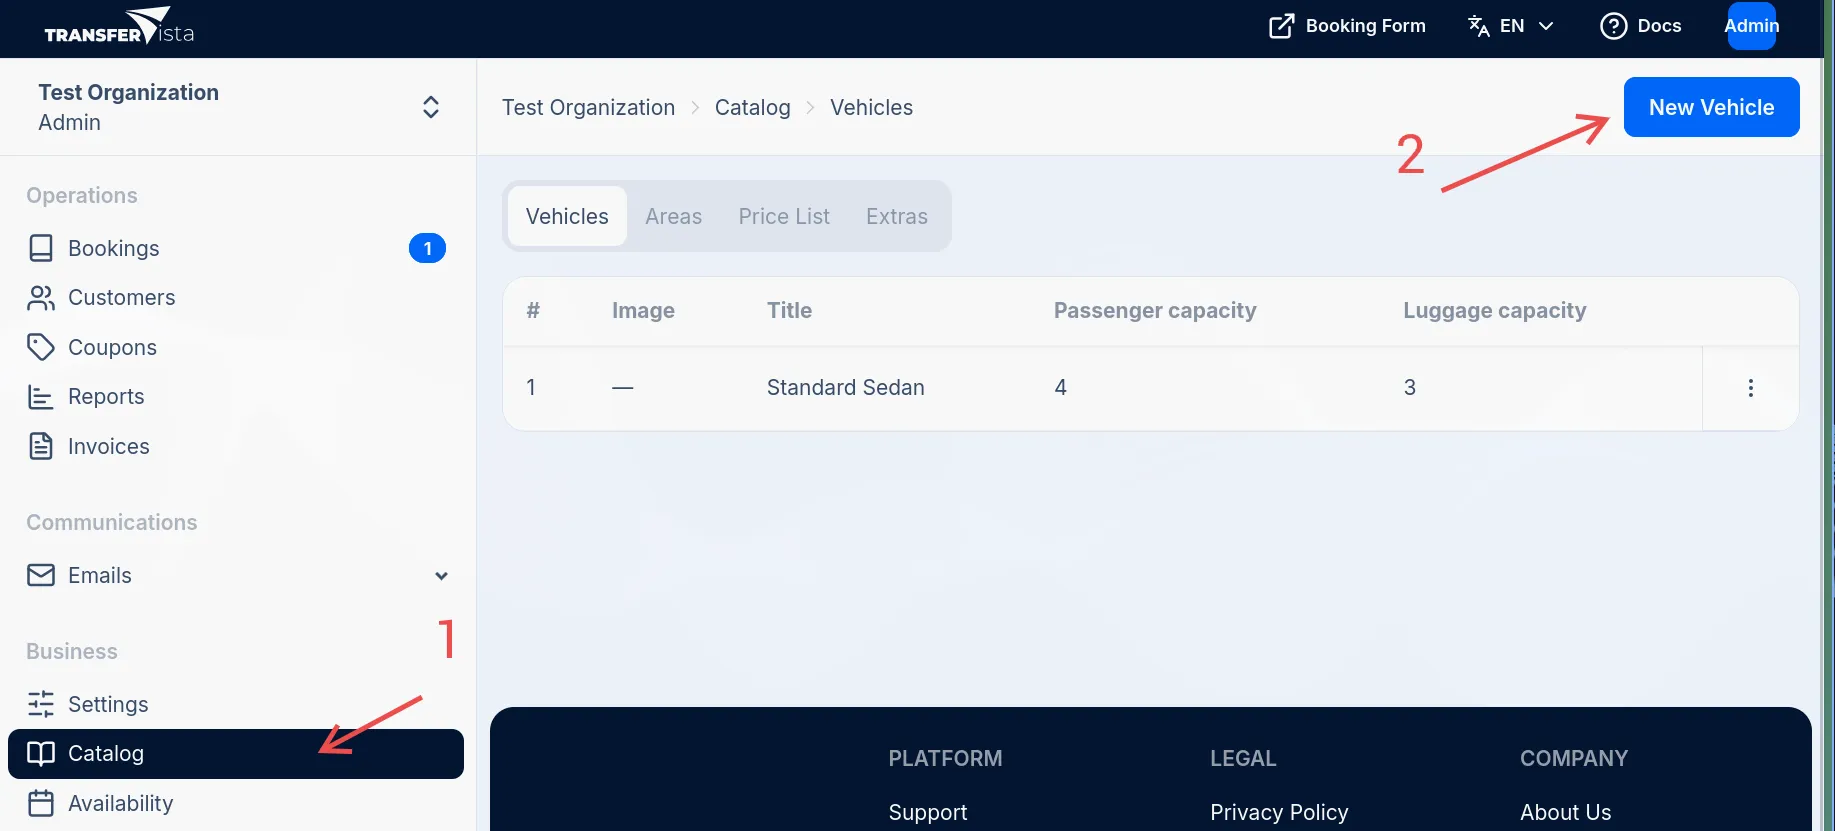
Navigate to Catalog > Vehicles in the sidebar
-
Click the New Vehicle button
-
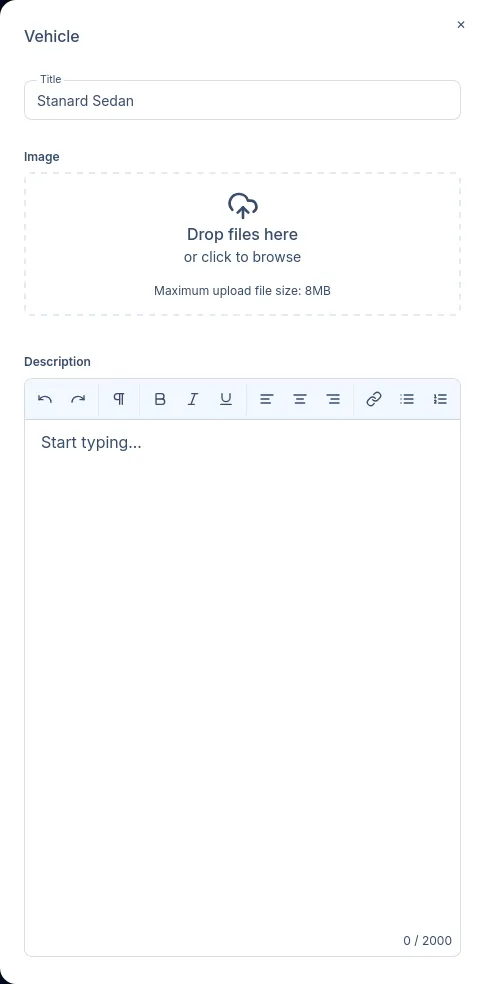
Fill in a title, passenger and luggage capacity, and optionally upload an image of the vehicle.
-
Click Save to create the vehicle
Step 2: Create an Availability Zone
Section titled “Step 2: Create an Availability Zone”Availability zones define the geographic areas where you offer transfer services. Customers can only book transfers to and from locations within your zones.
-
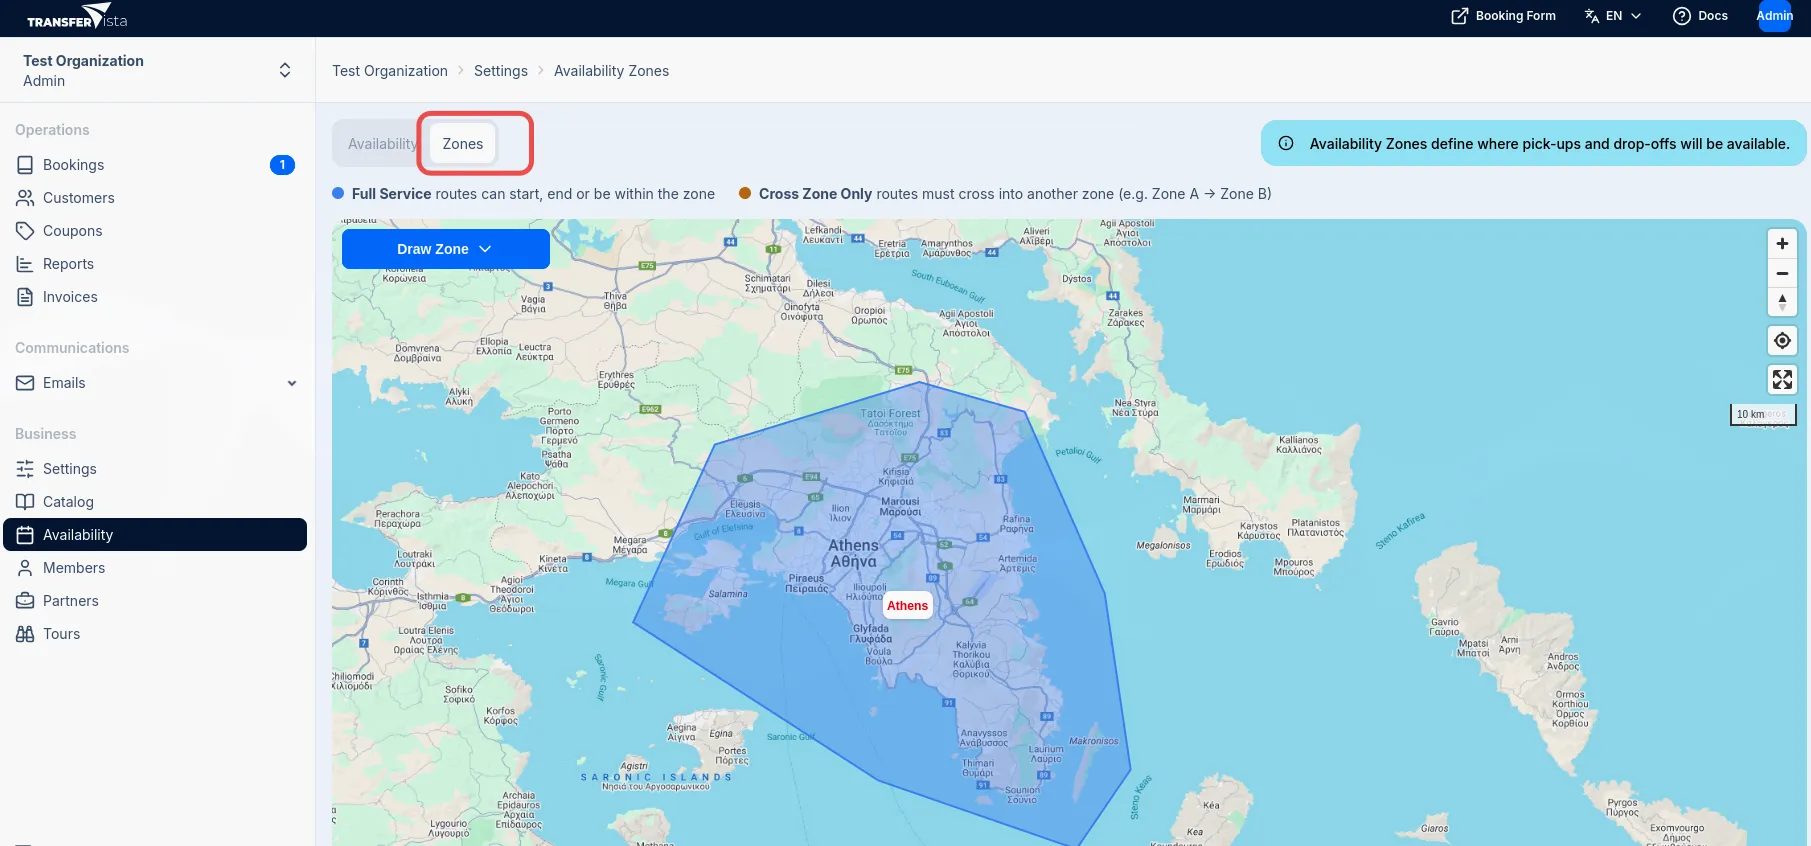
Navigate to Availability > Zones in the sidebar
-
Use the search box to find your service area on the map (e.g., “Athens, Greece”)
-
Click Draw Zone and select Full Service
-
Draw your zone by clicking on the map to create a polygon. Outline your service area, then close the shape by clicking near the first point.
-
Enter a name for your zone (e.g., “Athens Area”) and click Save
Step 3: Set Up Basic Pricing
Section titled “Step 3: Set Up Basic Pricing”Price lists determine how much customers pay for transfers. The simplest approach is to charge per kilometer.
-
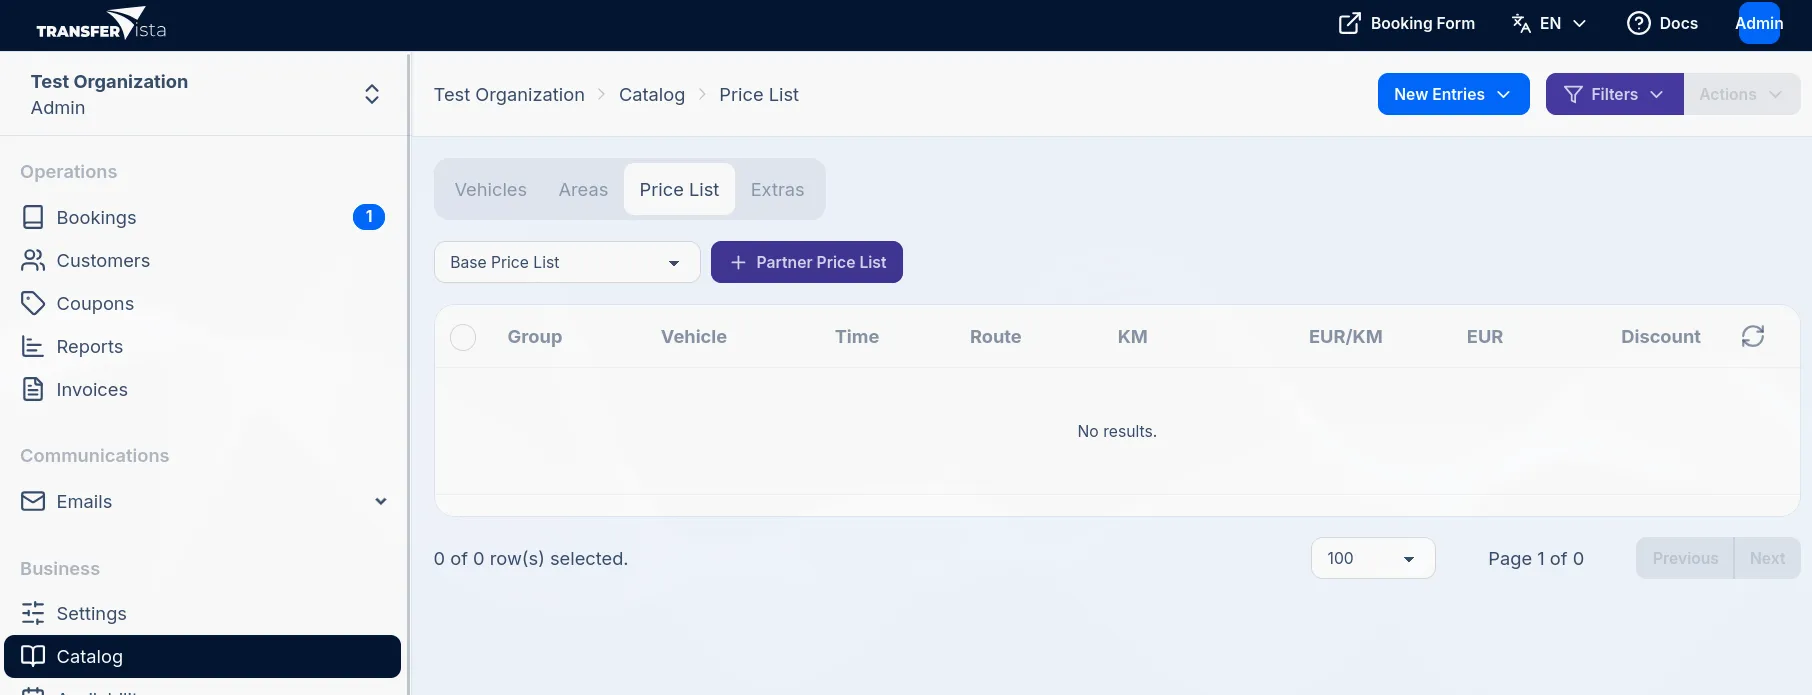
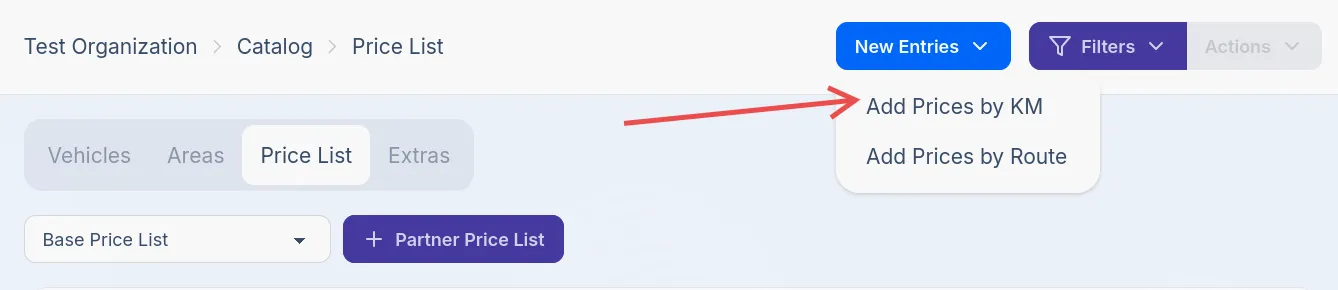
Navigate to Catalog > Price List in the sidebar
-
Click New Entries and select Add Prices by KM
-
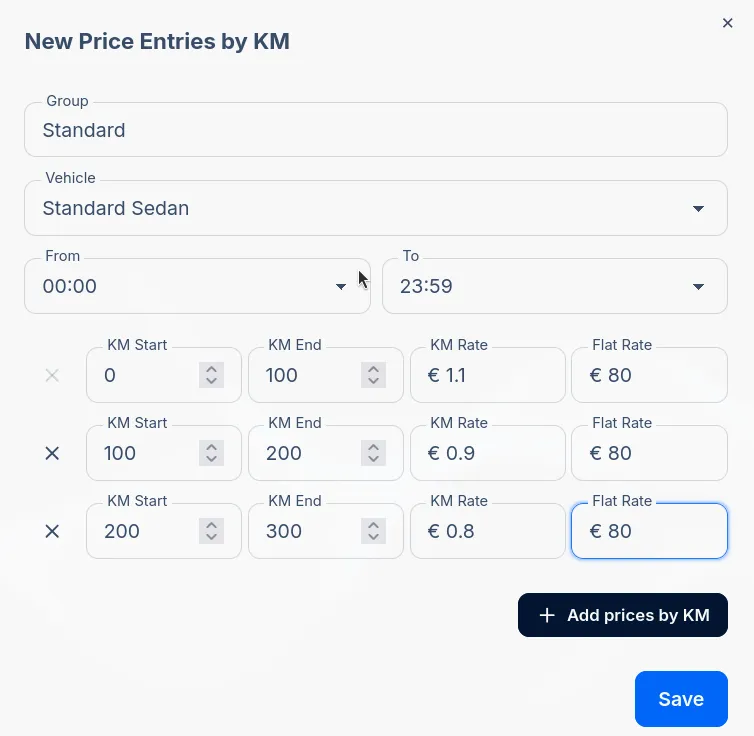
Fill in the pricing details:
- Group: A name for this price group (e.g., “Standard”)
- Vehicle: Select your vehicle (e.g., “Standard Sedan”)
- Time: Set to
00:00-23:59for 24-hour pricing - Rate per KM: Your rate per kilometer (e.g., 1.50)
- Flat Rate: You can add a flat rate on top of the per KM rate if desired
-
Click Save to create the price entry
Step 4: Test Your Booking Form
Section titled “Step 4: Test Your Booking Form”With vehicles, availability zones, and pricing configured, your booking form is ready to accept bookings.
-
Open your booking form URL in a new browser tab. Your URL follows this pattern:
https://your-subdomain.reserve-transfer.comYou can open the booking form by clicking the Booking Form button in the top-right of the dashboard.

-
Enter a pickup location in the From field (e.g., “Athens Airport”) and select from the suggestions
-
Enter a destination in the To field (e.g., “Syntagma Square, Athens”)
-
Select a Pickup date and Pickup time
-
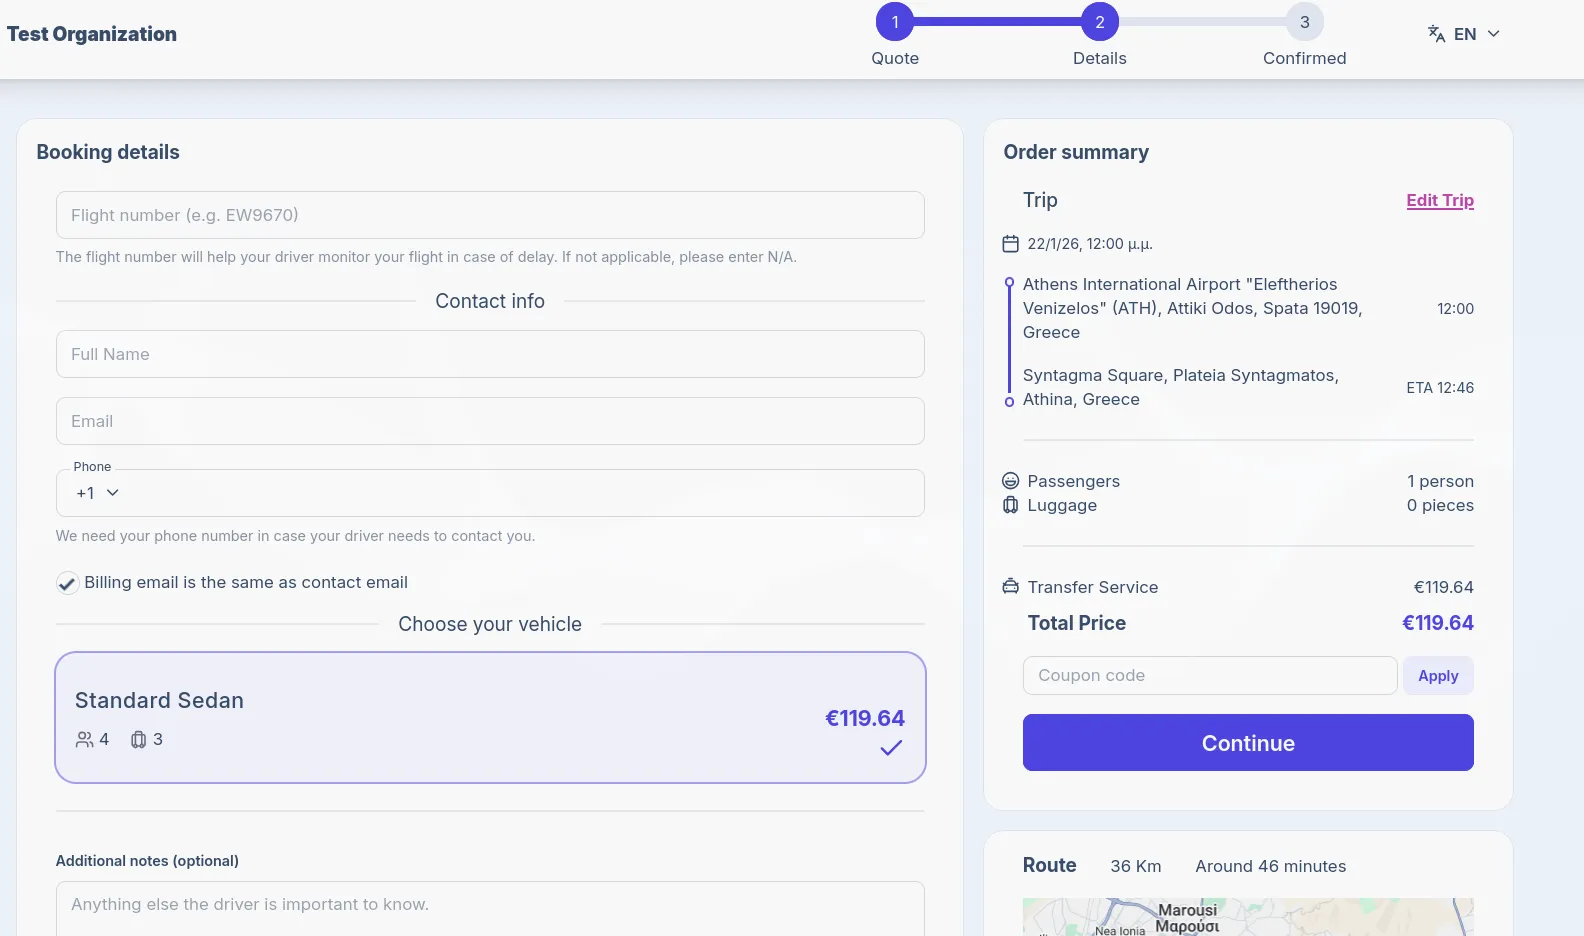
Adjust Passengers and Luggage counts if needed, then click Continue
-
Fill in the test customer details. You’ll notice ‘flight number’ appeared - we detected that the pickup location is an airport. This is now a required field
-
Accept the Terms of Service and click Continue
-
You’ll see a confirmation page with the booking reference number
What’s Next?
Section titled “What’s Next?”Congratulations! You’ve set up the basics and created your first test booking. Here are some recommended next steps:
Customize Your Brand
Section titled “Customize Your Brand”- Upload your logo and set brand colors in Settings > Branding
- Add your Terms of Service and Privacy Policy URLs in Settings > General
Expand Your Configuration
Section titled “Expand Your Configuration”- Add more vehicles to offer different options (minivans, luxury cars, etc.)
- Create additional price entries for different vehicle types
- Set up availability rules for business hours
- Set up areas and create price entries by route for popular routes
- Enable/disable email communication notifications
- Add extra services like meet-and-greet, child seats, etc.
Invite Your Team
Section titled “Invite Your Team”- Add team members and drivers in Team > Members
- Configure driver permissions in Settings > Permissions
Manage Your First Real Booking
Section titled “Manage Your First Real Booking”When a customer makes a booking, you’ll receive an email notification. Learn more about:
- Viewing and managing bookings
- Assigning drivers to transfers
- Understanding the booking status workflow
Troubleshooting
Section titled “Troubleshooting””No results found” when entering addresses
Section titled “”No results found” when entering addresses”This usually means the address is outside your availability zones. Make sure:
- Your zone covers the area you’re searching for
- The zone boundaries include airports, ports, and key destinations
Price shows as €0.00
Section titled “Price shows as €0.00”Check that your price list entry:
- Has a time range that covers the booking time
- Has a KM range that covers the distance of the route